
Docker is fantastic. I’m a Docker lover. I like the way development workflows are simplified by using it. It’s one of those IT domain tools preferred not only by DevOps/SRE, but also by developers. The reason? It’s easy to use and ship—and it saves you money, too.
There’s a lot to learn about Docker and how to make the most of it. But, since I’m assuming you already know the basics, I’m not going to discuss how to use it here. Rather, I’ll share five tips for securing and enhancing your Docker-based infrastructure, ones that I’ve learned over time.
Tip #1: Verify and Use a Certified Docker Image
Verifying the authenticity of all software codes is necessary before we can use them in our production environment. And when it comes to a Docker image, we have to ensure that the image we are pulling comes from an authorized source. Otherwise, we are leaving our systems open to man-in-the-middle (MITM) attacks.
So, how can we make sure that images we pull from Docker Hub are verified and don’t have vulnerabilities? By enabling the Docker Content Trust check. To do this, set the ‘DOCKER_CONTENT_TRUST=1’ in the environment variables, as shown below:
export DOCKER_CONTENT_TRUST=1
Now I will try to pull a Fedora image from my Docker Hub account. The Fedora image is not a signed image and will be denied. See Screenshot A.

However, if I try to pull the officially certified Fedora image, it will be allowed. See Screenshot B.

Tip #2: Check for Image Vulnerabilities
Every organization needs a risk assessment process or team that will check for software or application vulnerabilities. You can use a tool like Snyk to continuously scan and monitor the vulnerabilities in your used Docker images. When vulnerabilities are found in your software/application, Synk will notify you by email and via your Snyk account.
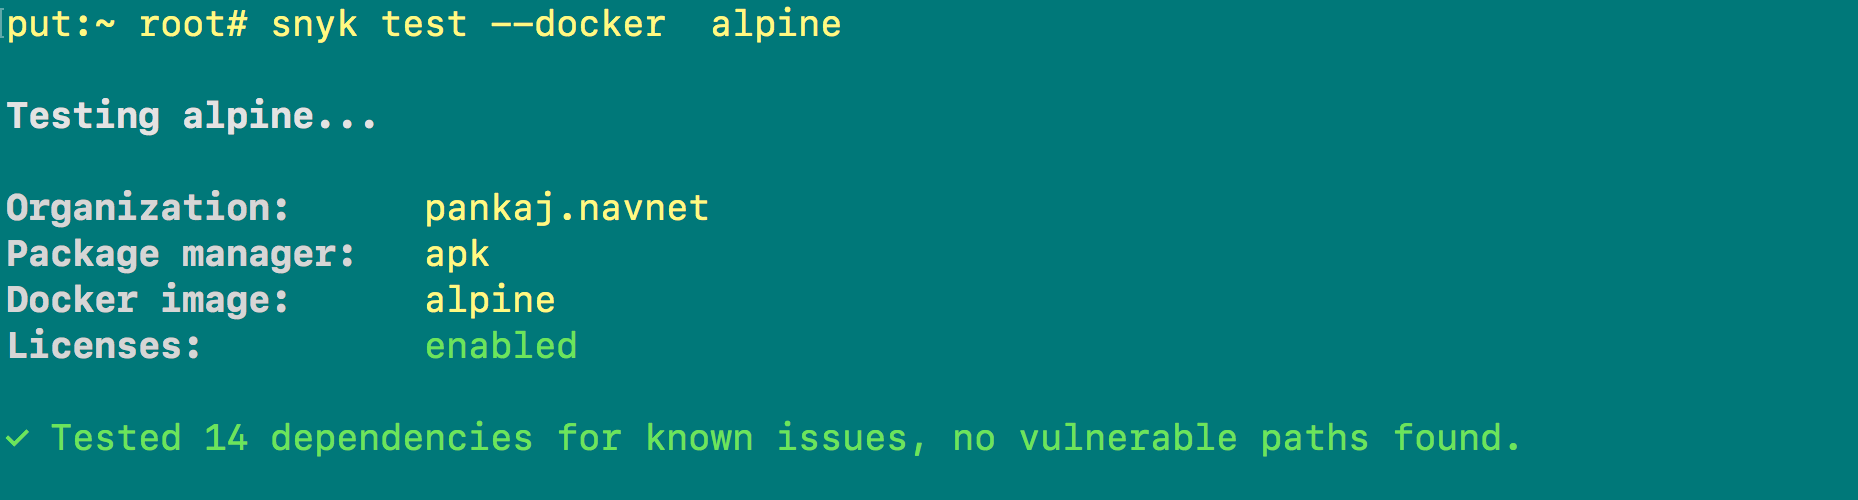
Let’s scan an Alpine image for vulnerabilities using the command below:
snyk test --docker alpine
The output of this command (see Screenshot C) clearly shows that no vulnerabilities were found in this image.
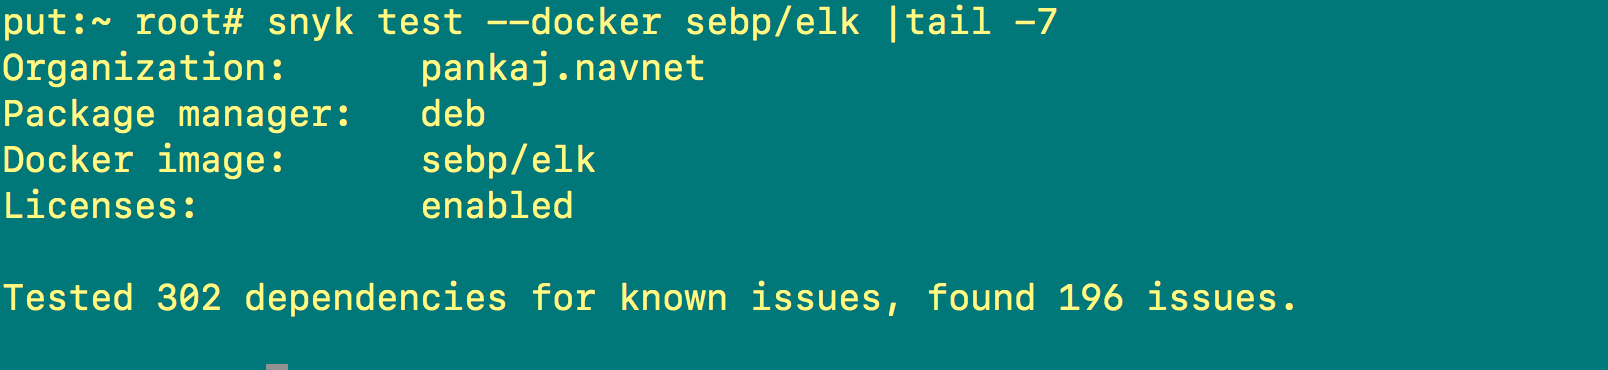
Now let’s scan another image. As you can see in Screenshot D, the output shows that 196 issues/vulnerabilities were found in that particular image.
snyk test --docker sebp/elk |tail -7
You can also send a notification about these vulnerabilities to your email and/or Snyk account using the following command:
snyk monitor --docker sebp/elk
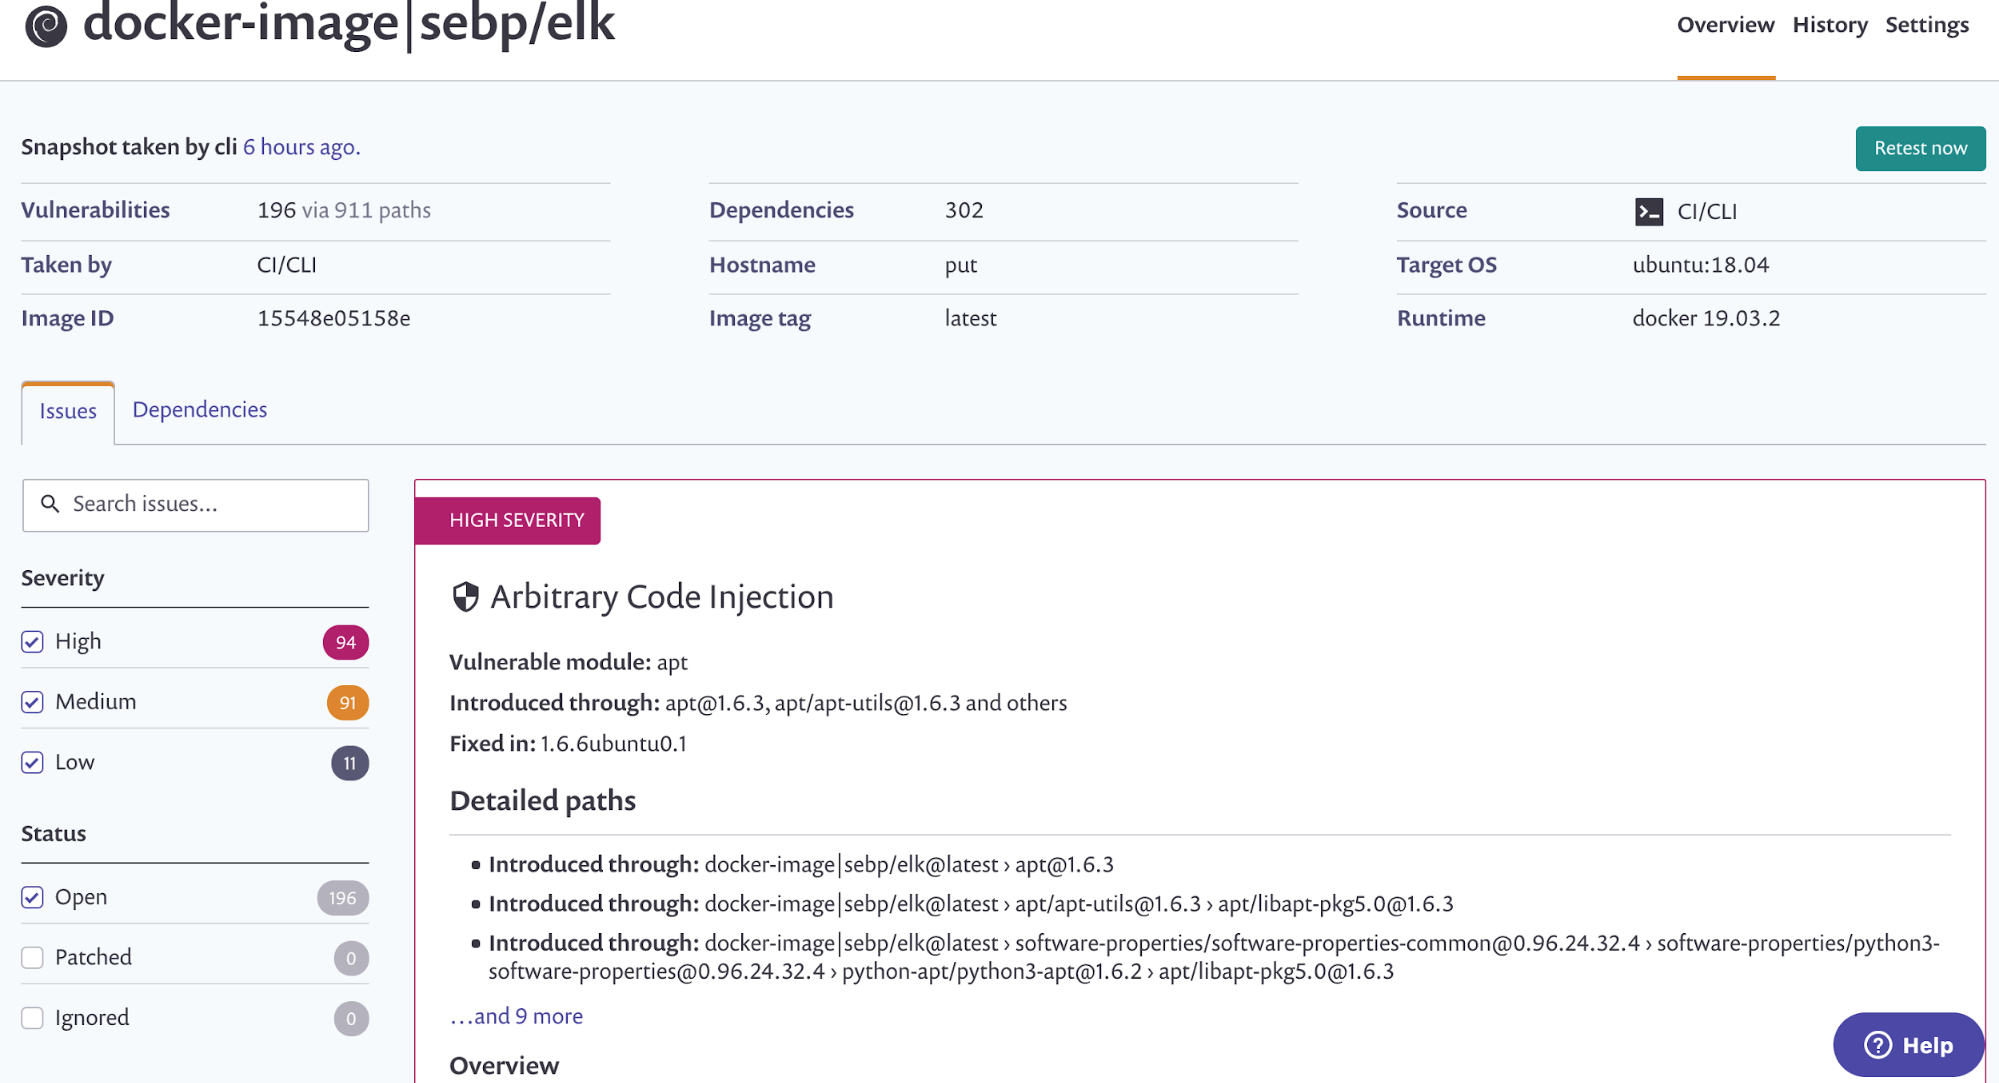
Screenshot E shows that the issues will be emailed to you.

Screenshot F shows that the same disclosed issues can also be seen on your Snyk account.
Tip #3: Create Lightweight Docker Images
One of the best practices when working with Docker is to create lightweight images. That’s because smaller Docker images result in faster deployments and are easier to ship, if required. You can keep your Docker image sizes under control with the following methods:
Method 1: Multistage Build
A multistage build means that you can use multiple base images in your Dockerfile with the help of FROM statements. In the first base image, you can build the packages of your application, then simply copy the required binaries and configurations to the final image. You can use as many FROM statements as you need.
Start by giving a name to the very first FROM statement. That way, you can use this name in your next FROM statement as a base image, and each of these FROM statements will start a new build stage. You can selectively copy the necessary files/folders from the first stage to the second stage, which serve the purpose of running the application. Below is an example of a Golang Dockerfile:
FROM golang:1.11 as buildstage1
WORKDIR /Users/put/IOD
COPY main.go .
RUN go build -o server .
FROM debian:stretch
WORKDIR /Users/put/IOD
COPY --from=buildstage1 /Users/put/IOD .
CMD ["./server"]
With the multistage build technique, the size of the final image is 107MB, while the original image size was 803MB.
Method 2: Distroless-Based Images
Distroless-based images are images that contain only your application/software, plus any related dependencies. They don’t contain any operating systems, so there are no bash shells, package managers, etc. in these images.
You can get distroless-based images from Google Cloud’s Container Registry. In the below example, we are using the Golang Dockerfile used previously (in Method 1).
FROM golang:1.11 as buildstage1
WORKDIR /Users/put/IOD
COPY main.go .
RUN go build -o server .
FROM gcr.io/distroless/base
WORKDIR /Users/put/IOD
COPY --from=buildstage1 /Users/put/IOD .
CMD ["./server"]
With distroless-based images, the size of the final image is 65MB, much less than the final size of the multistage build image (107MB).
Method 3: Alpine-Based Images
Alpine Linux is a musl libc and BusyBox-based Linux distribution. It is by far the smallest, simplest, and most secure Linux distribution on the market. The size of the Alpine distro starts at only 5MB. This means that by using Alpine as your base image, your Docker images will be even smaller than those created by distroless-based images. With Alpine-based images, your Golang Dockerfile will look like this:
FROM golang:1.11-alpine3.7 as buildstage1
WORKDIR /Users/put/IOD
COPY main.go .
RUN go build -o server .
FROM alpine:3.7
WORKDIR /Users/put/IOD
COPY --from=buildstage1 /Users/put/IOD .
CMD ["./server"]
Note that the size of the Docker image generated from the Alpine-based image (10.8MB) is even smaller than the distroless-based image (65MB).
Tip #4: Protect Sensitive Data Using Docker Secrets
Have you ever worried about how to protect sensitive data in applications that are hosted and running inside a number of Docker containers in your infrastructure? You can do this with the help of Docker secrets.
A secret is a set of data, such as token IDs, login passwords, database authentication, and SSH keys, which should not be transmitted over the Internet or stored unencrypted in a Dockerfile or your application’s source code. With the help of Docker secrets, you can manage sensitive data at runtime, when a Docker container needs the data but you don’t want to store it in a layer of your Docker image.
Note: Currently, Docker secrets is only applicable for Docker swarms, not for individual containers.
Secrets with Docker Swarm
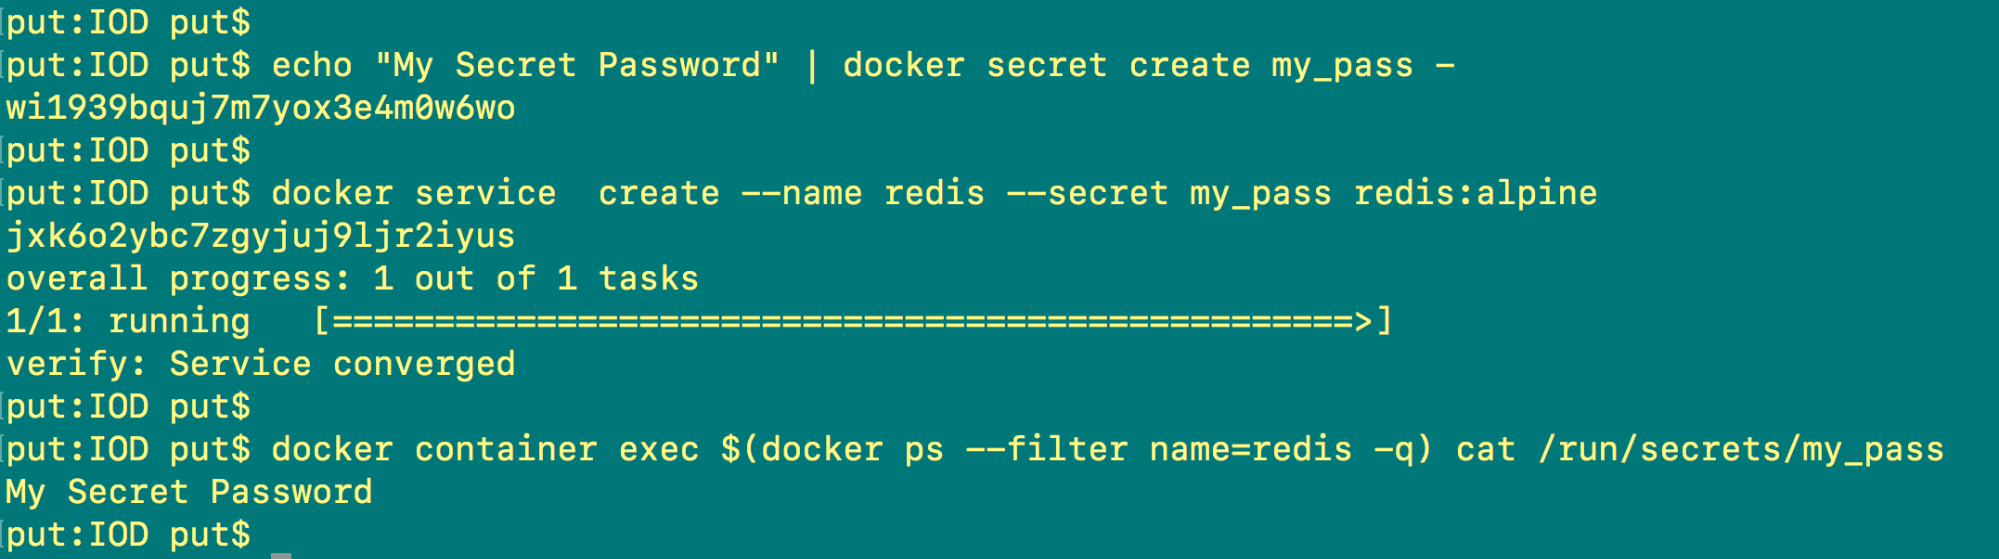
In order to start using Docker secrets, you need to have a Docker swarm already running. After that, add a secret to your Docker swarm, then create a service and give access to the created secret. The secret is then mounted onto the container at the location /run/secrets. Your application can then view and access the secrets it requires. You can do all of this with the following commands:
echo "My Secret Password" | docker secret create my_pass -
Note: The secret is added here to the swarm.
docker service create --name redis --secret my_pass redis:alpine
Note: A Redis service was created, and access was given to the secret
docker container exec $(docker ps --filter name=redis -q) cat /run/secrets/my_pass
Note: The application is able to read the secret.
In Screenshot G, you can see all of the above commands with their outputs.
Secrets with Kubernetes
Here I will show you how to use secrets to pull a private Docker image off Mongo from a Docker Hub account. I am assuming that you already have a running setup of a Kubernetes cluster.
First, log in to your Docker Hub account from the command line using the docker login command. Whenever you do this, the authentication token is stored in
/.docker/config.json
in the user’s home directory (see Screenshot H).
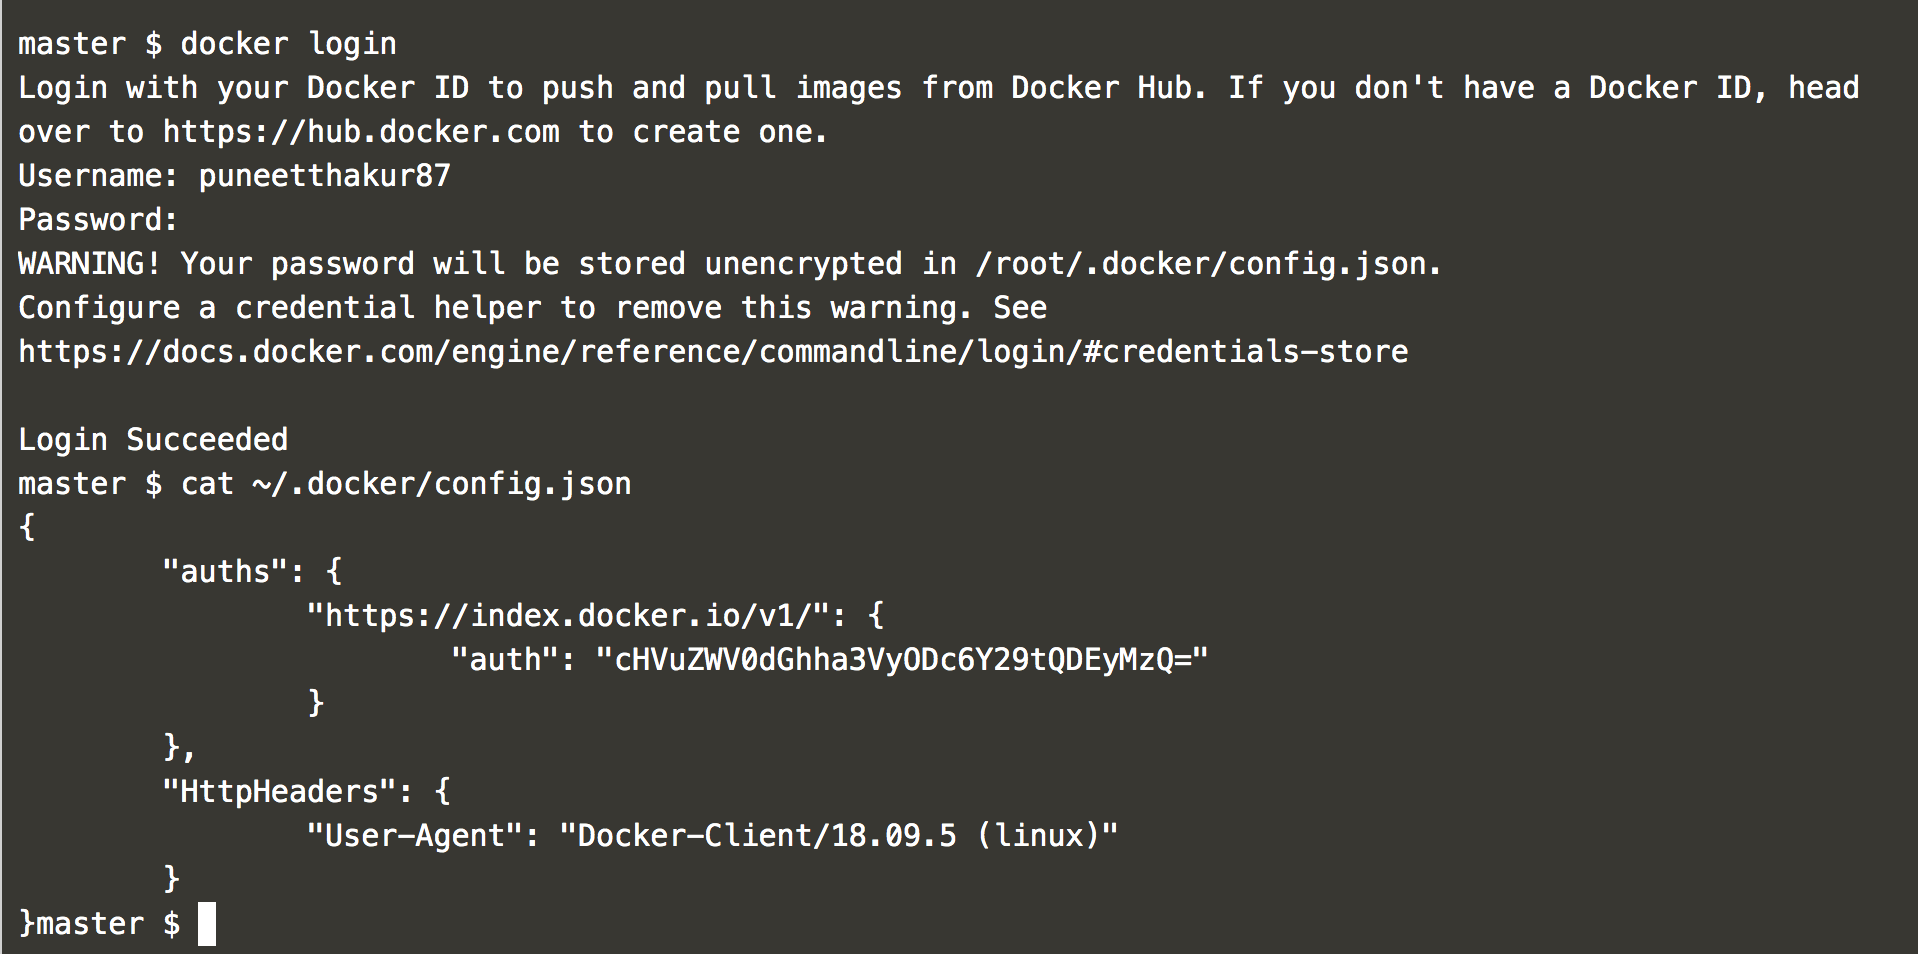
The Kubernetes cluster will use this config.json to create a secret and for authentication while pulling the private image from the registry. For this, run the below command
kubectl create secret generic regcred --from-file=/root/.docker/config.json
Now that the secret is ready, let’s use it with a Pod, so that Kubernetes can successfully pull the image from your private Docker Hub registry. Below is the configuration file of the Pod (Screenshot J).
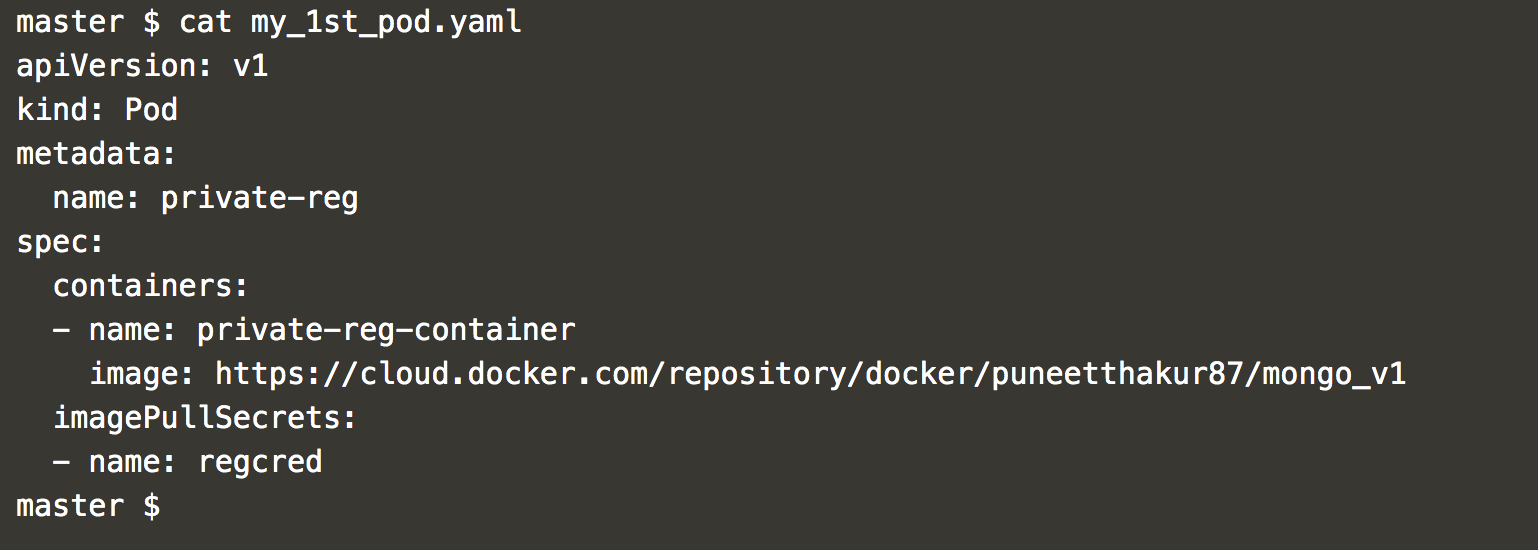
Run the below command with the Pod config file to pull the image using secret “regcred”:
kubectl apply -f my_1st_pod.yaml
Lastly, verify the status of the Pod:
kubectl get pod
NAME          READY STATUS             RESTARTS AGE
private-reg   1/1  Running    0          100s
Tip #5: Utilize Docker’s Container Restart Policy
If you think your machine goes down when a Docker daemon is running, enable the Docker service to start automatically after the machine restarts. This doesn’t mean that your previously running Docker containers will also start if your Docker daemon is up and running.
In order to start the containers automatically, use the Docker restart policy. This policy is responsible for determining what to do with a container after its exit. The default policy assigned to each container is “no,” which means that there is no action to take if a container exits.
Docker has the following restart policies, which you can use according to your specific needs:
|
Policy |
Description |
|
no |
No action will be taken here. |
|
always |
Restart the container, regardless of its exit status. |
|
on-failure[:retries] |
Restart the container if the exit status is non-zero. The number of retries can also be specified here. |
|
unless-stopped |
Configures to always restart, unless the container is explicitly stopped or Docker is restarted. |
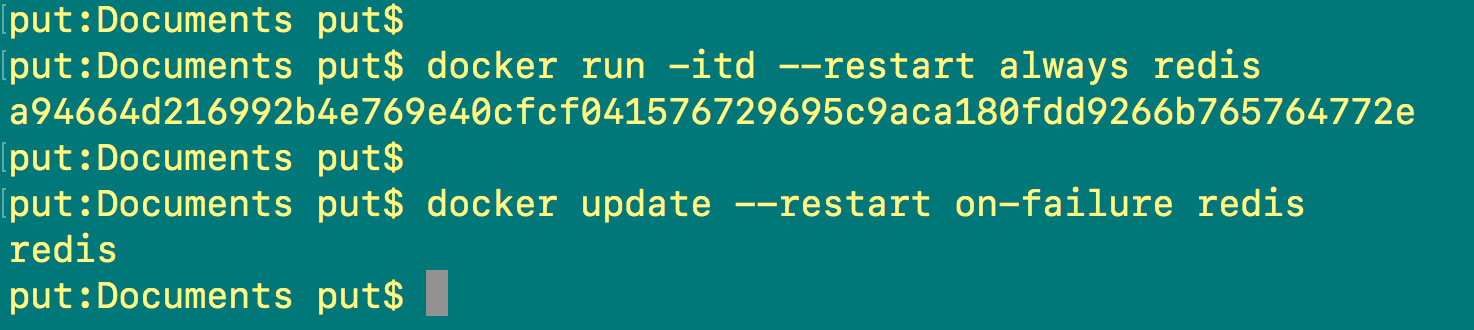
Let’s try to use these policies to auto-restart the containers. In order to do that, you need to use the –restart flag with docker run/update commands (see Screenshot K).
docker run -it -d --restart always redis
Note: This will always restart the Redis container.
docker update --restart on-failure redis
Note: Here we have changed the restart policy for the Redis container.
Bonus Tip: Migrate Docker Containers
Because technology is constantly changing, there are multiple situations that require migration: it simply can’t be avoided. Migration can be related to hardware changes, data center movement, obsolete packages, and more. So, if your applications/software are hosted on Docker containers and such a situation arises, you’ll need to migrate the Docker containers. There are two ways to complete the Docker container migration.
Method 1: Docker Export and Import Commands
First, you can use the Docker export and import commands. The export command will create a compressed file of the container, like the one shown below:
docker export reds | gzip > redis.gz
In order to move the container to other hosts, use the scp command to transfer the redis.gz file. Then run the below import command to use the exported container:
zcat redis.gz | docker import - redis
It’s important to note that when using Docker’s export and import commands, you can only migrate a single container at a time. In order to migrate the entire container, you’ll need to use the second migration method.
Method 2: Copy the Complete Docker Directory to the New Host
In this method, we will copy the complete Docker directory /var/lib/docker to the new host. You can use any compression method to make a compressed folder of this directory, and then use scp or rsync commands to move it to a new location/machine. Also, you’ll need to consider the following points:
- Before migrating, the Docker daemon must be stopped.
- File/folder permissions and ownerships must be preserved.
- The Docker version must be exactly the same on both the old and new hosts.
- Important configurations (if any) related to containers must be maintained.
End Notes
I hope all of these tips will help you while you’re working with Docker, and also inspire you to introduce something new into your Docker journey. Also, try to dig further, to find out more about the Docker system—and feel free to share your own tips and tricks with the world.
You can learn more about Docker in our previous post on the five key benefits of Docker.